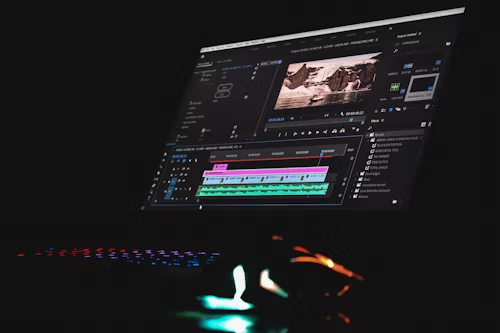
Removing the background from a video can transform your content, making it more engaging and professional. Whether you’re creating marketing materials, educational videos, or creative projects, Adobe provides powerful tools to achieve seamless background removal. Adobe’s suite of software, particularly Adobe Premiere Pro and Adobe After Effects, offers robust solutions for this task. These tools are widely used by professionals for their precision, flexibility, and integration with other Adobe products. This article explores how to remove video background using Adobe’s tools, focusing on their features, workflows, and tips for optimal results.
Why Remove Video Backgrounds?
Background removal allows creators to isolate subjects, replace backgrounds with new visuals, or add special effects. For instance, you can place a subject in a virtual environment, overlay graphics, or create a clean, distraction-free look. Adobe’s tools make this process accessible, even for complex footage, by leveraging advanced masking, keying, and editing capabilities. Whether you’re working with green screen footage or a busy background, Adobe’s software provides the precision needed for professional-grade results.
Adobe Premiere Pro: A Starting Point for Background Removal
Adobe Premiere Pro, a leading video editing software, is an excellent starting point for background removal, especially for green screen or chroma key projects. The process begins with importing your video into a new project. Premiere Pro’s Ultra Key effect is the go-to tool for removing solid-color backgrounds, such as those shot against a green or blue screen.
To use Ultra Key, drag your video clip onto the timeline, then navigate to the Effects panel and locate the Ultra Key effect under Video Effects > Keying. Apply it to your clip, and use the eyedropper tool to select the background color you want to remove. Adjust settings like Tolerance, Pedestal, and Shadow to refine the keying process. These controls help eliminate color spill and ensure clean edges around your subject. For best results, ensure your footage is well-lit with even lighting on the background to minimize artifacts.
Premiere Pro also supports masking tools, allowing you to manually isolate subjects in non-green screen footage. By drawing a mask around your subject in the Effect Controls panel, you can refine the selection frame by frame. This method is ideal for simple backgrounds but can be time-consuming for complex scenes. Premiere Pro’s integration with Adobe After Effects makes it easy to send clips to After Effects for more advanced background removal tasks.
Adobe After Effects: Advanced Background Removal
For more complex background removal, Adobe After Effects is the industry standard. After Effects offers sophisticated tools like the Roto Brush and Refine Edge Tool, which are designed for detailed subject isolation, even in footage without a green screen. These tools are particularly useful for dynamic backgrounds or when you need precise control over edges, such as hair or clothing.
To start, import your footage into After Effects and create a new composition. Select the Roto Brush tool from the toolbar, and paint over your subject in the first frame. After Effects’ AI-powered propagation will automatically track the subject across frames, though you may need to make manual adjustments for accuracy. The Refine Edge Tool helps smooth out tricky areas like hair or motion blur, ensuring a natural-looking result. You can then composite your subject onto a new background or export the clip with a transparent background for use in other Adobe applications.
After Effects also supports chroma keying for green screen footage, similar to Premiere Pro, but with more advanced controls. The Keylight effect, found under Effects > Keying, provides granular adjustments for color selection, spill suppression, and edge refinement. This makes it ideal for professional projects where precision is critical.
Tips for Success with Adobe Tools
To achieve the best results when removing video backgrounds with Adobe software, consider the following tips:
- Use High-Quality Footage: Well-lit, high-resolution footage with consistent backgrounds simplifies the keying or rotoscoping process. For green screen shoots, ensure the background is evenly lit and free of wrinkles.
- Leverage Adobe Integration: The seamless workflow between Premiere Pro and After Effects allows you to start in Premiere for basic edits and move to After Effects for detailed compositing. Use Dynamic Link to avoid rendering intermediate files.
- Fine-Tune Edges: Pay attention to edge details, especially with hair or transparent objects. Tools like Refine Edge in After Effects can significantly improve the quality of your output.
- Test on Small Clips: Before processing an entire video, test your settings on a short clip to ensure the background removal looks natural across different lighting conditions or movements.
- Utilize Adobe Tutorials: Adobe’s website offers extensive tutorials and community forums where you can learn advanced techniques or troubleshoot issues specific to your project.
Why Choose Adobe for Background Removal?
Adobe’s tools stand out for their versatility and professional-grade capabilities. Premiere Pro is ideal for quick edits and green screen projects, while After Effects offers unmatched precision for complex footage. The integration between these programs streamlines workflows, allowing editors to move seamlessly between editing and compositing tasks. Additionally, Adobe’s constant updates ensure access to the latest AI-driven tools, such as improved Roto Brush algorithms, making background removal faster and more accurate.
Conclusion
Removing video backgrounds with Adobe Premiere Pro and After Effects is a powerful way to elevate your video projects. Whether you’re working with green screen footage or complex scenes, Adobe’s tools provide the flexibility and precision needed for professional results. By mastering Ultra Key, Roto Brush, and other features, you can create polished videos that stand out. With practice and attention to detail, Adobe’s software empowers creators to bring their visions to life, transforming ordinary footage into extraordinary content.
